5 Simple Steps to Replace Pool Light Safely and Efficiently

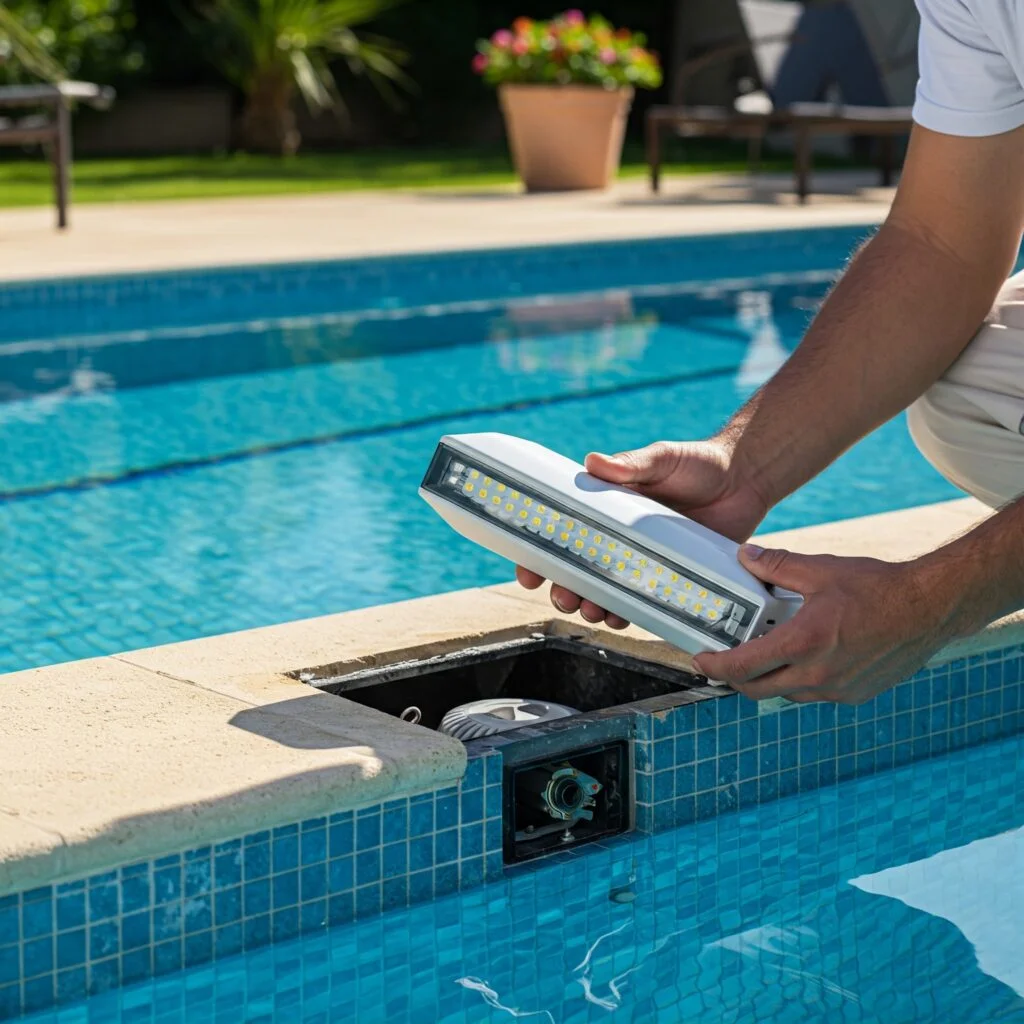
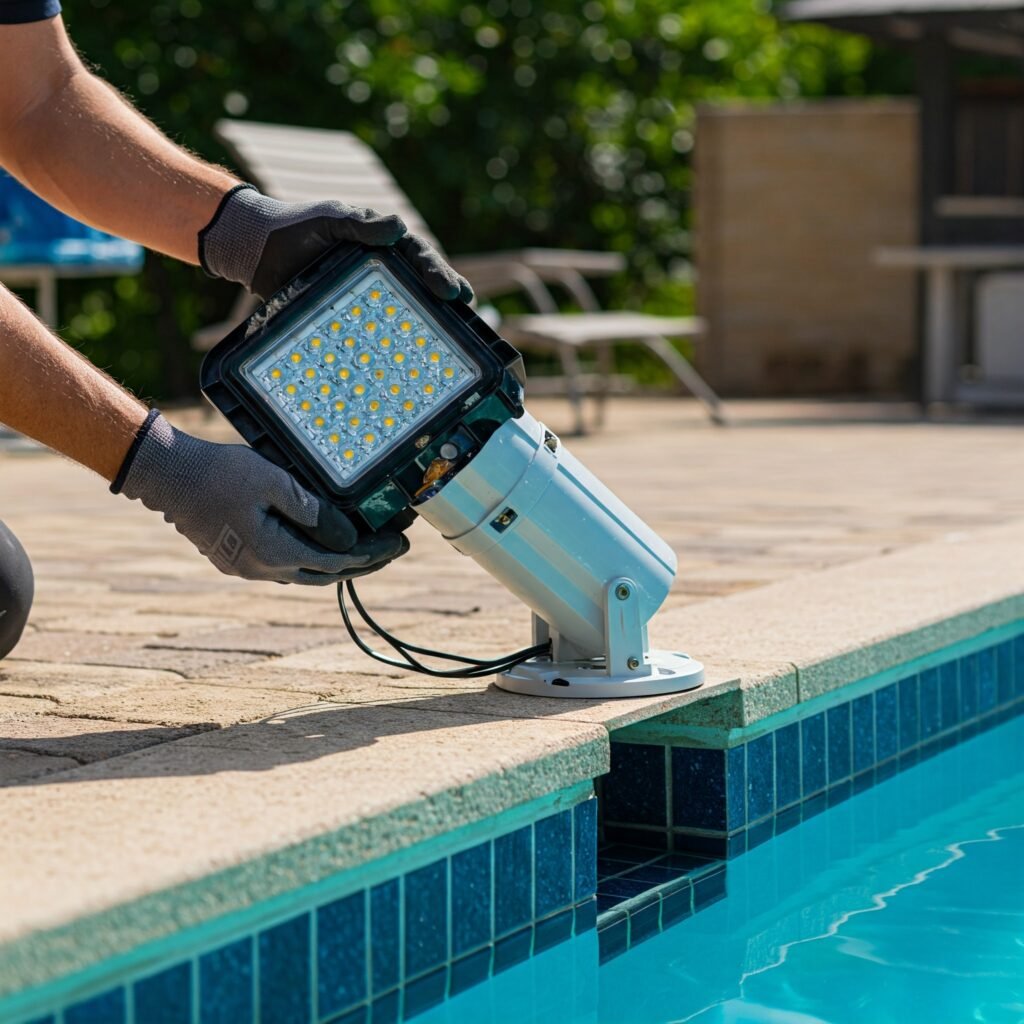
Replacing a pool light may seem intimidating, but with the right approach, it can be straightforward. If your current light is flickering, dim, or not working, learning how to Replace Pool Light can save you time and money.

This guide walks you through the entire process – from shutting off power to testing the new installation. Follow these steps to Replace Pool Light smoothly while avoiding common mistakes.

Why Do You Need to Replace Pool Light?

Before starting, understand why you should Replace Pool Light when it fails:

A malfunctioning pool light creates safety hazards, especially with potential water leakage or electrical issues. Modern LED options are more energy-efficient than old halogen bulbs. When you Replace Pool Light with newer models, you improve both visibility and pool aesthetics.

Tools Required to Replace Pool Light

Gather these tools before you Replace Pool Light:

  • Screwdrivers (flathead and Phillips)
  • Replacement pool light (check compatibility)
  • Voltage tester
  • Silicone sealant
  • Safety gloves and goggles
  • Dry cloth

Having these ready makes it easier to Replace Pool Light without interruptions.

5 Simple Steps to Replace Pool Light Safely and Efficiently

Step 1: Turn Off Power Supply

Safety first when you Replace Pool Light:

  1. Locate the circuit breaker for your pool light
  2. Switch it off completely
  3. Verify no power with voltage tester

This crucial step prevents shocks when you Replace Pool Light.

Step 2: Remove Old Pool Light

To properly Replace Pool Light:

  1. Find the fixture’s mounting screw/clamp
  2. Carefully remove fasteners
  3. Gently pull light from niche, keeping cord intact

Avoid damaging wiring or gasket when you Replace Pool Light.

Step 3: Inspect Wiring and Niche

Before you Replace Pool Light with new unit:

  • Check for damaged/corroded wires
  • Examine niche for cracks
  • Look for water inside fixture

Fix any issues before you Replace Pool Light to prevent future problems.

Step 4: Install New Pool Light

When ready to Replace Pool Light with new one:

  1. Connect new light’s wiring properly
  2. Secure with waterproof connectors
  3. Apply silicone sealant to gasket
  4. Secure light in niche

Double-check all connections after you Replace Pool Light.

Step 5: Restore Power and Test

Final steps after you Replace Pool Light:

  1. Restore power at breaker
  2. Turn on light at control panel
  3. Verify proper operation

If light fails after you Replace Pool Light, recheck connections.

Waterproofing After You Replace Pool Light

Critical step when you Replace Pool Light:

  • Ensure proper silicone sealing
  • Check for moisture later
  • Verify gasket seating

These steps after you Replace Pool Light prevent leaks.

Maintenance After You Replace Pool Light

Extend life after you Replace Pool Light:

  • Clean lens regularly
  • Inspect wiring annually
  • Replace bulbs proactively

Proper care means you won’t need to Replace Pool Light as often.

5 Simple Steps to Replace Pool Light Safely and Efficiently

When to Call a Professional

Consider an expert to Replace Pool Light if:

  • Wiring is severely damaged
  • Niche needs replacement
  • Unsure about electrical safety

Sometimes it’s best to have a pro Replace Pool Light.

Conclusion

Now you know how to Replace Pool Light safely. Following these steps helps you Replace Pool Light efficiently while avoiding hazards.

Remember to prioritize safety when you Replace Pool Light. If uncertain, consult a professional to Replace Pool Light correctly.

After you Replace Pool Light, enjoy better visibility and a safer swimming environment.

4 thoughts on “5 Simple Steps to Replace Pool Light Safely and Efficiently”

  1. Pingback: Insulated Garden Shed: 7 Reasons to Own One Now

  2. Pingback: Why Solar String Lights Outdoor Are Perfect for Your Garden

  3. Pingback: Understanding the High-Risk Merchant Account at HighRiskPay.com: Key Insights You Need to Know - hayathomeessentials.com

  4. Pingback: Best Electric Fondue Pot Set for Chocolate Lovers - hayathomeessentials.com

Leave a Comment

Your email address will not be published. Required fields are marked *

Scroll to Top