Adding lattice under your deck is a great way to improve aesthetics, provide ventilation, and keep pests out. If you’re wondering how to install lattice under deck, this guide will walk you through the process step by step. With the right tools and techniques, you can achieve a clean, professional look that enhances your outdoor space.
Why Install Lattice Under Your Deck?
Before diving into how to install lattice under deck, it’s important to understand why this addition is beneficial:
Before cutting any materials, measure the space where you’ll install the lattice.
Note the height and width between deck posts.
Account for any slopes or uneven ground.
If the area is large, plan for multiple lattice panels with support frames.
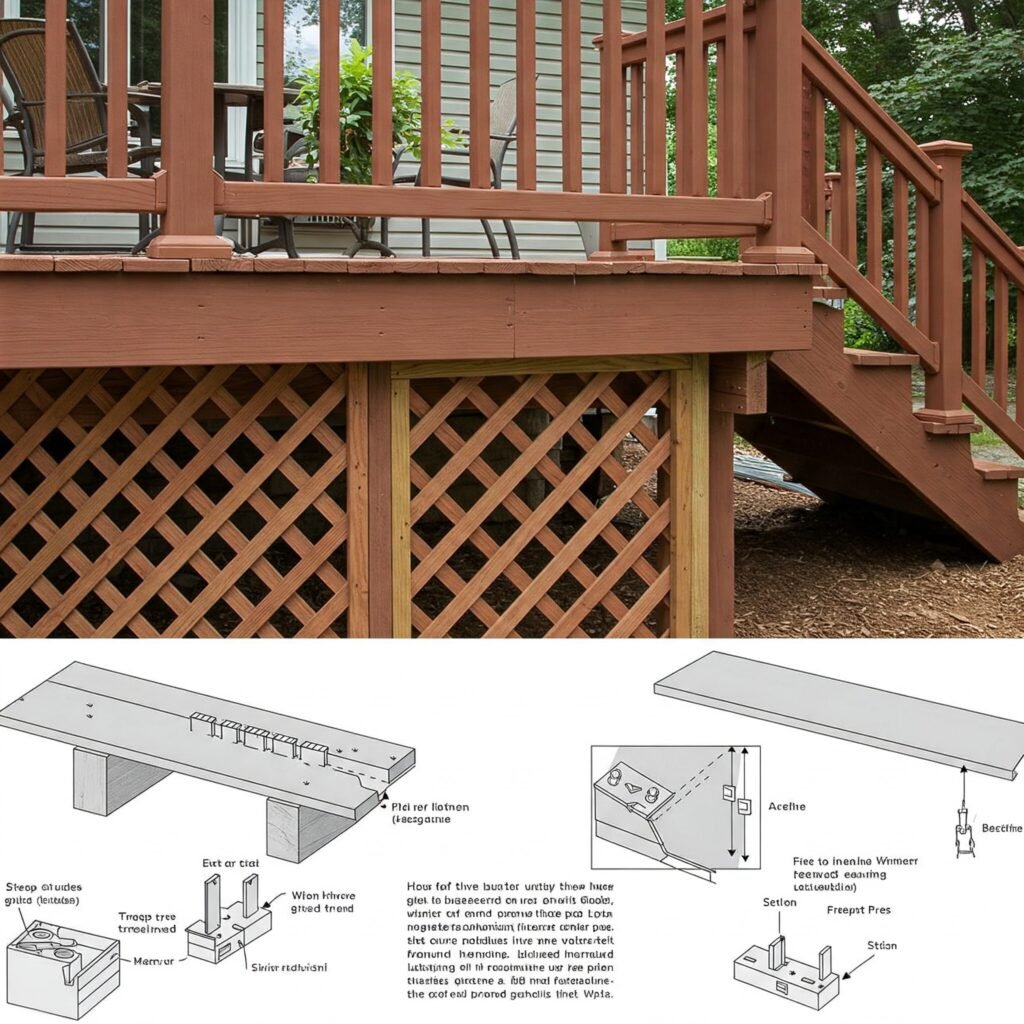
Step 2: Build a Support Frame
A sturdy frame ensures the lattice stays secure.
Cut pressure-treated 2x4s to fit around the perimeter.
Secure horizontal beams at the top and bottom.
Add vertical supports every 4-6 feet for extra stability.
Step 3: Cut Lattice Panels to Size
Most lattice panels come in 4×8 sheets, so you may need to trim them.
Use a circular saw for straight cuts or a jigsaw for curves.
Sand rough edges to prevent splinters (if using wood).
Step 4: Attach the Lattice to the Frame
Now, secure the lattice panels to the support frame.
Pre-drill holes to prevent splitting.
Use screws (not nails) for a stronger hold.
Leave a small gap (¼ inch) for expansion in humid weather.
Step 5: Secure the Lattice to the Deck
If attaching directly to the deck:
Align the frame with the deck’s rim joist.
Drill pilot holes and fasten with screws.
Ensure the lattice is level before final tightening.
Step 6: Anchor the Bottom (If Needed)
For extra stability, secure the bottom of the lattice:
Use concrete footings or post anchors.
Alternatively, attach a pressure-treated kickboard.
Step 7: Finishing Touches
To enhance durability and appearance:
Paint or stain wood lattice to match your deck.
Add trim pieces for a cleaner look.
Inspect for loose screws and tighten if needed.
Common Mistakes to Avoid When Installing Lattice Under Deck
Even with the right steps, errors can happen. Avoid these pitfalls:
Skipping the frame – Lattice alone isn’t strong enough.
Using nails instead of screws – Screws hold better over time.
Ignoring ground clearance – Leave space to prevent rot.
Poor measurements – Always double-check before cutting.
Maintenance Tips for Lattice Under Deck
Once installed, keep your lattice in good shape:
Clean annually – Remove dirt and debris.
Check for damage – Repair or replace warped panels.
Conclusion
Now that you know how to install lattice under deck, you can tackle this project with confidence. A well-installed lattice improves both function and style, making your deck look complete. Follow these steps, avoid common mistakes, and enjoy a polished outdoor space for years to come.
Need more help? Check out our additional guides on deck upgrades and maintenance!