
If you want to lay brick or tile for a home project, it’s important to understand the steps that lead to a clean and lasting result. Whether you’re fixing up a kitchen floor, redoing your bathroom, or creating an outdoor walkway, doing it the right way can save you time and money later.
This guide will help you get started, even if you’ve never done this kind of work before. From preparing your space to sealing the finished surface, we’ll walk you through it all in simple steps.
Get the Tools You Need
Before you begin, make sure you have the right tools on hand. Using the proper equipment makes everything easier and helps you get better results.
You’ll need things like:
- A level
- Rubber mallet
- Tile spacers if you’re using tile
- A notched trowel for spreading adhesive
- A brick hammer if you’re working with bricks
- Chalk line
- Buckets for mixing
- A wet saw or brick saw
- Safety gear like gloves and goggles
Having these ready before you start will help your project go smoothly from the beginning.
Prepare the Surface
The surface you’re working on must be clean, dry, flat, and strong. If it’s not, the bricks or tiles may not stick well or could shift later.
For tile, you might need to lay down a cement board. For bricks, you usually need a layer of compacted gravel and sand.
Make sure to sweep the area clean and fill in any holes or cracks. Use a level to check the surface for high or low spots, and smooth it out as needed.
Pick the Right Materials
Choosing the right type of tile or brick is a big step. Think about where you’re working and how the surface will be used.
If you’re tiling a bathroom, pick something that handles moisture well, like ceramic or porcelain. If you’re doing an outdoor patio, look for bricks that are tough and weather-resistant.
Also, think about the color and texture that fits your space. Some tiles are smooth and shiny, while others are rough or matte. The right choice can make a big difference in how your project looks and lasts.
Plan the Layout First
Before you start laying anything down, it’s a good idea to plan how the bricks or tiles will be arranged.
Start by measuring your space and marking a center point. Use a chalk line to create straight lines as a guide. Lay out a few rows without adhesive to see how they’ll fit.
If you’re using tile, add spacers to keep the lines even. If you’re working with bricks, try to keep a steady distance between each one for the mortar.
Planning ahead will help avoid small or awkward pieces around the edges.
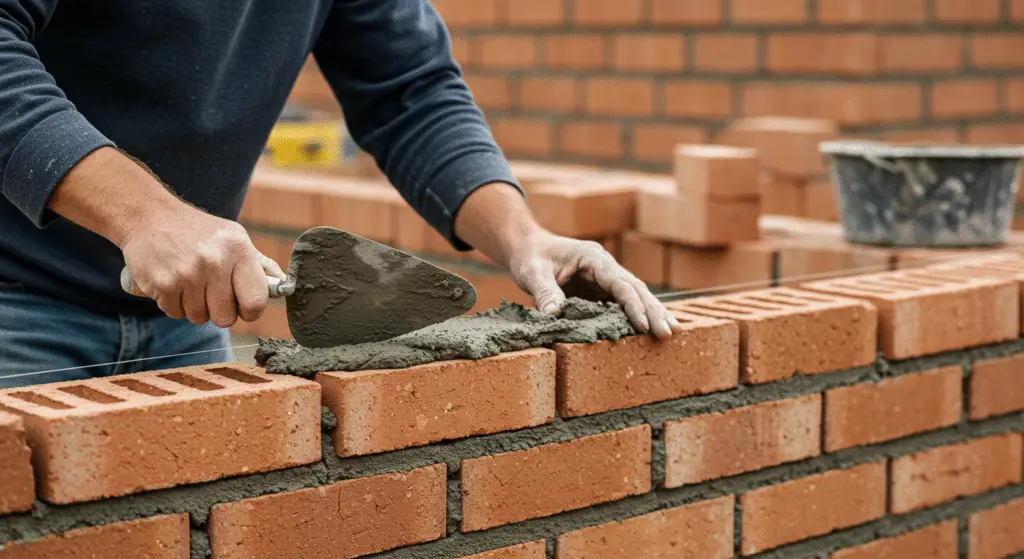
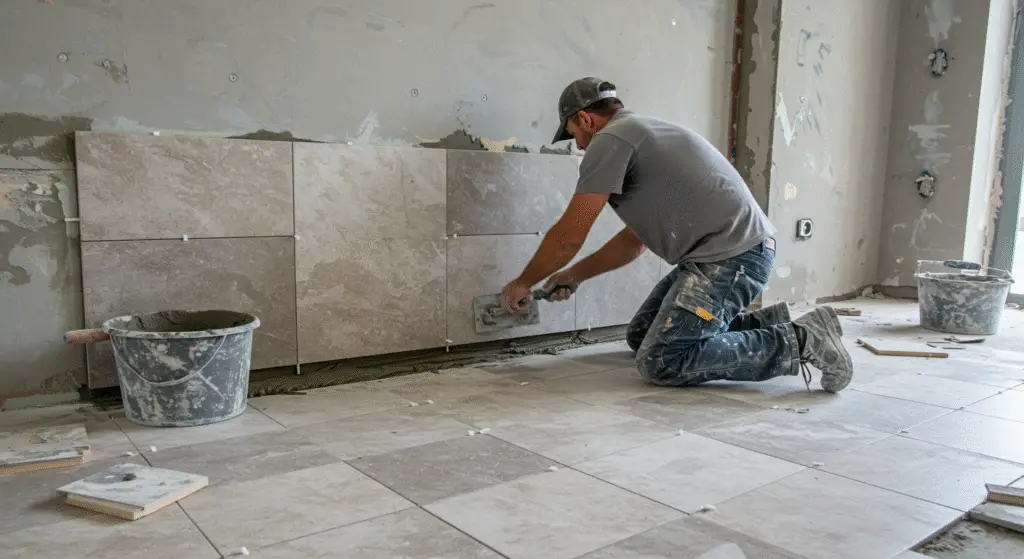
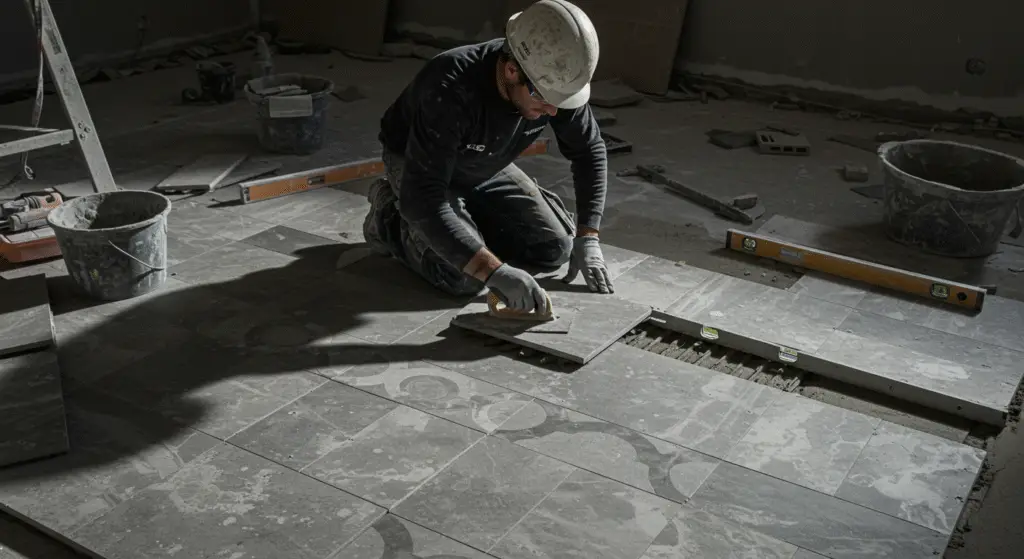
Time to Lay the Bricks or Tiles
Now you’re ready to lay the brick or tile. How you do this depends on what material you’re using.
For tile:
- Mix your tile adhesive.
- Spread it with a notched trowel.
- Press each tile into the glue with a small twist.
- Use spacers between tiles to keep even gaps.
For brick:
- Mix mortar to a firm, spreadable texture.
- Spread mortar on the base and on each brick.
- Tap the bricks into place gently with a mallet.
- Check that everything stays level as you go.
Work in small sections so the glue or mortar doesn’t dry before you’re finished.
Cut to Fit Around Edges
Most projects will need some tiles or bricks cut to fit around corners, walls, or pipes.
Use a wet saw for cutting tiles or a masonry saw for bricks. Always wear safety gear when cutting.
Measure carefully and double-check before cutting. Making clean, accurate cuts helps everything fit together nicely and look professional.
Fill the Gaps and Seal the Surface
After everything is laid, wait about 24 to 48 hours for the adhesive or mortar to fully set. Then, it’s time to fill in the joints.
For tile, remove the spacers and spread grout over the surface using a rubber float. Push it into the gaps, then wipe the tiles clean with a damp sponge.
For brick, use a pointing tool to fill the gaps with mortar and smooth them out.
Once everything is dry, apply a sealer to protect the surface. This helps keep out water, stains, and dirt, and keeps your work looking great for years to come.
Easy Tips to Remember
- Always start on a clean, level surface.
- Take your time with the layout before you start gluing or setting.
- Keep tools and safety gear close by.
- Cut carefully, and double-check your measurements.
- Don’t rush the drying time before adding grout or mortar.
Use a sealer to protect your hard work.
Common Questions
Can I lay tile or brick over an old floor?
Yes, if it’s flat, clean, and strong. But it’s often better to remove old flooring first for the best results.
How long will the job take?
Small indoor projects can take a day or two. Bigger outdoor jobs may take longer, especially when you count drying time.
Is this a beginner-friendly task?
Yes, with some patience and the right tools, it’s a good DIY project. Start with a small space if you’re new to it.
Do I need a permit?
Not usually for small home jobs, but it’s best to check local rules if you’re doing a big outdoor project.
Pingback: Penny Tile Bathroom Designs: Timeless Style Guide.
Pingback: Tiles and Decor for a Stunning Garden Oasis: Transform Your Outdoor Space - hayathomeessentials.com